Wednesday 29 February 2012

Not the regular spaghetti with sausage

A wanted to make some spaghetti with meatballs and sausage. He is normally not too interested in cooking, so it was a bit of a surprise. Also the thing he did was a surprise.


He had seen a picture of a sausage spaghetti in facebook and wanted to make them too. If you google 'spaghetti sausage' you'll find some similar pictures.

So assumingly it would be quite difficult to push the boiled spaghetti inside the sausage, but that's not how it's done. Next picture will tell it all.


And then those are boiled. The food looks weird, but it's fully edible and actually quite good tasting. I'd bet this would be especially fun for kids (and for 30ish something guys).

Monday 27 February 2012

Open sesame

Last week I picked up the Sesam wall bed mechanism from the post office. I had ordered the mechanism from Sweden and I got instruction on how to put it together in Norwegian, Danish and Swedish, which is handy for a Finnish speaking person. Well it wasn't too bad, I do after all know some Swedish. Also the mechanism was very easy to figure out.

First I of course removed the bed's own legs. Then I needed to add some bits of wood on the bottom of the bed since the sides are a bit different in this bed than in a bed that these mechanism legs are designed for. First I just glued the wood pieces on and when I attached the legs I at the same time attached the pieces with screws.


The legs on the other end that have a hinge I screwed to the outside of the bed. Those would have looked neater inside but the structure of the bed was a bit different so I had to use this style. On the other hand it does not really matter what they look like since I've planned to build a cabinet to cover the bed.


We had measured that the bed does not fit under the wooden valance on that wall, but it just does. So now we can deside to either have the bed on this wall or on the opposite wall.

We did lay on the bed and it felt fine, it's not as sturdy as it was with it's own legs but it's not unstable either.

Now we have a magic bed. Open sesame!


Close sesame!


Friday 24 February 2012

Squirrel in a glass house

On Thursday morning a squirrel found it's way to our conservatory. But will it find it's way out?


Wednesday 22 February 2012

Bindings for coat sleeves

You know spring is here soon? I know there is still half a meter of snow outside but never the less spring is coming. I can tell by the amount of light we are having, it's not dark when I drive to work or when I return from work, also the birds are singing, a lot, it's so nice.

On spring and fall I use my trench coat that I've bought a few years back. It's a lovely coat and I wear it all the time when the weather allows. I've worn it so much that the sleeves had started to fray from the edge. But otherwise it's in a good shape, so it's in no way going to trash.


I thought I'd add a binding on the edge of the sleeve to cover up the fraying. I had hard time deciding which colour to make the binding from. I had a few options. I could have used the same colour as the trench coat fabric is or then the same colour as the buttons and the belt buckle are on the coat. Also I thought of using some totally different colour. The lining of the coat has some light blue colour and I did think about that for a while, but then figured it would look kind of dumb, because there is no light blue on the right side of the coat. On the end I set on the dark brown of the buttons. The sleeves get dirty easily and in darker colour the stains won't show so clearly.


I went to the fabric store with the coat belt and found fabric very close to the colour of the belt buckle and buttons. Then made two bindings from the fabric and sewed them on.


Once I had sewed on the bindings I didn't really like them, the sleeves looked so different than they looked before so I thought I had made a mistake on the colour. But then I asked A that how he likes my jacket now. And he didn't even realize what had changed in it. So I guess they don't look dumb after all, at least for someone who does not know/remember how it looked like before the bindings do not look conspicious.

Tuesday 21 February 2012

I'm a Giant - challenge participants


Mini Dork has done an amazing work and has collected all the participants of the I'm a Giant - challenge on her blog the Modern Mini Houses. If you are interested in how the Challenge is going on the other participants please check out the post of all the challengers and the separate page for the challengers.

I had known many had participated in the challenge and I had assumed many had finished it too, but I had lost their links. I am so thankfull for Mini Dork for putting up that incredible list of all the participants. Thank you.

Monday 20 February 2012

Office armchair slip cover


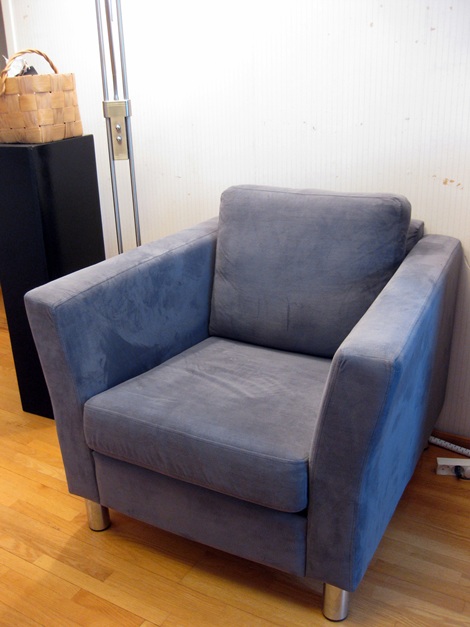
Making a slip cover for the office armchair has been on my to-do list forever. The upholstery of the chair is originally gray although in some light it looks bit blue. The colour itself is not totally bad atleast when it looks gray, but the fabric creates lots of static electricity. Every time I get off the chair I get a static shock. I hate that.


I assumed that a cotton slip cover would fix the static electricity problem. I wasn't sure, but I also did want to change the colour of the chair to white. So I had to give it a try.

The chair is mostly very square in shape so I made only two patterns from places where I could not just cut out square pieces from the fabric.


Also the chair expands a bit on the armrest. After I had finished the slip cover for the main frame I realized that I cannot put it on because the lower part of the cover is smaller than the top part. So I had to add a zipper on the back.


My grandmom taught me the basics of sewing long time ago, I think I was around sewen when I started to sew with the sewing machine and after that I am self taught. But I've gotten sloppier over the years, faster but sloppier and to tell you the truth it does not matter. My grandmom taught me that most things should be tacked together before sewing, but I never do that I just pin. I've learned that in bigger and smaller projects there will always be mistakes, so I don't mind if there are one or ten. I don't actually know why I'm telling you this, maybe because if you look at the zipper closely, you'll notice that it's not well done. But it works and it's on the back of the chair so who cares.

Anyway I've learned a few tricks while teaching myself how the sew. In my opinion the best way to make a cover for a pillow with side pieces is first to sew a zipper on the middle of one of the sides, then attach the pieces to form a large circle. After that's done I pin the top and the bottom on the sides.


To remove the pillow inside the pinned cover I draw lines with a pen to mark where the pins are, then remove the pins from one side and remove the pillow. I don't use the zipper for removing the pillow since it's usually very difficult with all the pins.


Then I repin the egde and sew using the pins as a mark where to sew. Oh and what is very important is to leave the zipper a bit open. It's very difficult to open the zipper from the back side.


I didn't iron it so it's a bit wrinkled. Also ignore the wall, no painting is happening anytime soon. But want to hear the good news? It's not an electric chair anymore! The cotton cover helps. Yiihaa!

Friday 17 February 2012

New old excersice bike

When A had that accident while downhill skiing about three weeks ago it was clear that something had broken in his knee. We later found out that the anterior crusiate ligament of his left knee had teared and to fix it A will have knee surgery done on early march. Before the surgery he will need to be able to bend his knee to 90 degree angle and straighten the leg, which seems to be most difficult now. Also he needs to excersice so the muscles stay strong. The doctor suggested biking and swimming.


We loaned from A's grandpa an excersice bike, we think it's from the 70's. It was very dirty and ugly, but A cleaned it up and it's not actually as horrible looking as I assumed, it's kind of fun, very retro. I doubt we will be keeping it forever but it's needed now and after the surgery. It's good he has a place to excersice easily.

Wednesday 15 February 2012

Pile of shirts

We've been going through A's closet. Just from two shelves we found this big pile of rag T-shirts. Crazy!

Monday 13 February 2012

Projects are coming along

I introduced my to do list for the office redo on The grand plan - post I did some time ago. This is what I've done so far.

Floorplan

The Sesam wall bed mechanism should be on it's way. We are not going to Stockholm after all, all the cruise ships were full when we started to book the trip, but I ordered the mechanism few days ago.
  • Move the shelf on the small window wall closer to the small window (the yellow long rectangle)
  • Move the table against the big window wall, or even get a new table
All moving is waiting for the painting of the shelves. I cannot move the shelves with all the books on them so when I remove the books then I will paint the shelves at the same go.
  • Place a table board inside the shelf (the yellow rectangle on the top right corner) to create a computer station
The table board has been bought. 
  • Get a nicer looking office chair for A

I've looked for some office chairs but haven't found anything nice and resonable priced.

Building, painting and sewing

  • Remove wallpaper and paint the room white or light colour
I've removed wallpaper from one wall, but then the shelf came on the way. I was so excited to remove the
wall paper that I didn't realize that I have no place where I could now paint the shelves and move them out
of the way. I have to wait for spring before I can move the shelves to the terrace and then paint.


  • Make a closet for the guest bed
This is waiting for the Sesam wall bed mechanism and spring.
  • Paint the shelves white
  • Sew a roman blind for the big window or get a roller blind
  • Sew a slipcover for the chair
Started making the slip cover on sunday. It's going on nicely.

Friday 10 February 2012

Baby booties


Made booties for my friends' soon to come baby. I used a pattern I found from a Finnish crafts book, but here is very similar pattern in English.

While I was looking for that pattern with google, I found baby socks that look like duck feet, they are hilarious. Check those out!

Wednesday 8 February 2012

Finished cushion project


Hihhey! All of the dining table seat cushions are done. Last friday I had a post about the problems I had when making the cushions. But after I got over the corner pieces in the cushion it got whole lot easier and I'm proud to say those are all finished now.

Inside the covers are foamed plastic that were cut to the shape of the seat at the shop. I used velcro on the back egde so I can remove the foamed plastic from the covers before washing. Also I used velcro on the strips that will keep the cushion on it's place on the seat.


Whew... it took a while, way over a year to tell the truth, but now they are done.

Monday 6 February 2012

Frosted windows and a lesson learned


We've had -20 C (-4 F) and all the windows in the conservatory have gotten beautifully frosted. We cannot see outside from the livingroom, but the light still comes in.


Also here is a lesson to be learned. Remember when I made the ice lanterns earlier? I've been making more of them. In one comment I warned not to leave the bucket with water to freeze for too long since it can break the bucket. So do as I say not as I do. Remember to remove the ice from the bucket when the lantern walls are thick enough. If all of the water frozes solid, it pushes the bottom of the bucket so hard that it eventually breaks. Like this:


Friday 3 February 2012

Unfinished cushion project


I restarted making the dining chair cushions last weekend. I originally started the project.... umm... way over a year ago. And now I remember why I didn't finish. I had made two cushions, but we have six dining chairs. This time I thought I will make a production line and make each step on all the cushions at the same go, I thought that would make it easier.

I have no idea why but the threading of the serger did not go very well, one of the threads kept falling off from it's place and resulted in the serger just making holes on the fabric but not sewing anything together. I threaded and rethreaded the machine but it kept doing that. I was so furious with the machine that I cried.

When A came home and I had been strugling with the serger for hours I explained the problem to him, he didn't do anything to the serger, he just listened. Then I tried again and the serger suddenly started to work. What's the thing that when you want to show something and suddenly the thing does not work at all like it has done for hundreds of times before. This time it was for better but still it's so annoying.

First I sewed together the top and bottom and the side with the serger. After I had spent the whole weekend just making few straight seams with the serger I started to sew on the corner pieces where the back rest goes through. I sewed both corner pieces on to one cushion cover. The sewing of the corner pieces is a pain because of the corner obviously. I was going mental just with that piece, but then realised I made a mistake on the long seams I had made with the serger. I should have stopped the seam on the edge and not continue it to the end of the fabric. Now I cannot sew with the machine both the corner piece and the piece that goes round the back rest, if I sew on the other one it will be very difficult to sew the other piece. So I need to sew one of those by hand. That was monday when I realized that. I got so annoyed that I couldn't even touch the project for a few days.


Now I've desided I will do atleast one step a day and sooner or later those will be finished. I will continue over the weekend. Hope I get past the corners and then it will get easier. I'm amazed how such a simple looking cushion can turn out so tricky.

Wednesday 1 February 2012

Breakfast

I guess I'm very stuck in my habits. Every work morning and on some weekend mornings too I eat a small cup of natural yogurt with nuts and either berries and honey or jam if I've forgotten to thaw berries from the freezer.


The grapefruit is not inculed in my standard breakfast, this picture was just taken on the weekend when I eat a bigger breakfast.

What do you eat for breakfast?
Related Posts Plugin for WordPress, Blogger...